| Step
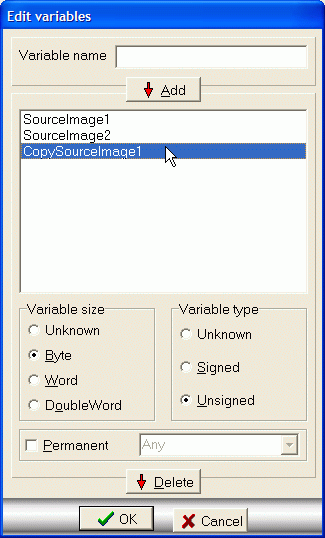
2 - Defining variables
The first step is
defining the variables
that will be used in this code sample: clicking on the button with a
key
on it or choosing Edit|Variables from the menu (Ctrl-V) opens the Edit
Variables window.

The name of the variable
is typed in the
edit box at the top of the dialog, then clicking on the Add button
will add the newly defined variable to the list of variables on the
center
of the window. When you select a variable from the list, you can
optionally
choose its type (Signed or Unsigned) and size (Byte, Word or
DoubleWord).
A permanent variable is
allocated to a
MMX register at the beginning of the code and it is never deallocated:
permanent variables are used to implement accumulators that must be
preserved
between iterations of the same loop. Allocating a permanent variable
reduces
the number of free MMX registers and it may reduce the degree of
parallelism
that can be achieved: a variable should never be declared as permanent
if it does not need it. You can also force the allocation of a
permanent variable to a specified MMX register.
Now two variables
(SourceImage1 and SourceImage2)
that contain 8 unsigned bytes each have been defined, so press the OK
button
to close the Edit Variables window.

|